
JACKYLED 4-Pin L-Shape Connector Kit
4.2Editor score
Ten L-shaped connector boards
Supports 10mm 4-pin strips
Includes straight extension clips
Explore the best corner connectors for LED strip in 2026, comparing compatibility, pin count, gapless design, installation ease, and quality for DIY lighting.
Corner connectors for LED strip make it easier to turn, extend, and organize lighting installations without soldering at every junction. A good connector should match the strip’s width, pin count, voltage, and conductor layout while maintaining a clean electrical connection. The right choice also depends on whether you need a true electrical joint, a simple corner guide, or an adhesive-mounted support.
This guide compares ten connector kits based on the specifications and features supplied for each product. It covers solderless L-shaped connectors, reusable gapless designs, multi-piece kits, and corner-mounted alternatives for common RGB, COB, SMD, and addressable LED strips. Compatibility receives particular attention because a visually similar connector may not fit the strip’s pin arrangement or board width.
The list shows which products excel for particular projects, from budget four-pin installations to compact COB corners and wider adhesive-backed options. Each review highlights useful benefits, limitations, and ideal applications so you can narrow the field before buying. Product availability, ratings, and prices can change, so confirm the latest listing details and strip specifications before ordering.
4.2Editor score

4.5Editor score

4.4Editor score
The comparison below highlights each kit’s strip compatibility, connection style, included components, and corner format. Because LED strip connectors are not interchangeable unless their width, pin count, and contact arrangement match, the most important decision is fit before appearance or project convenience.


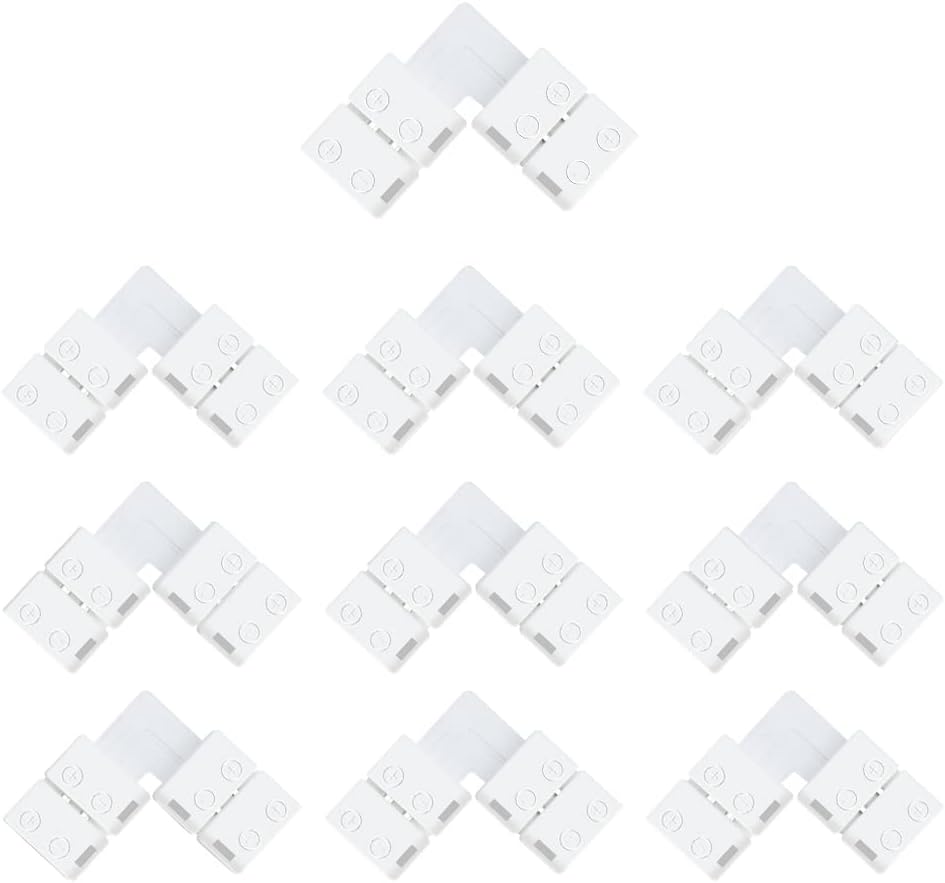

The JACKYLED kit combines ten L-shaped connector boards with 22 clips and extra straight couplers, making it a versatile budget option for 10mm four-pin strip installations. Its strongest feature is dual-purpose utility: the same basic platform can turn a strip through a right angle or continue it in a straight line. This makes the kit useful for media cabinets, workstations, counters, and larger room layouts where several runs meet.
We may earn a commission when you buy through this link, at no additional cost to you.
The connector is designed for 4-pin, 10mm-wide SMD 3528 or 5050 multicolor strips, including waterproof and non-waterproof versions. Installation does not require soldering. Each strip end slides beneath the appropriate metal contacts, the positive side is aligned with the marked positive direction, and the clip is snapped into place. The detachable design also means that a layout can be adjusted rather than permanently fixed at the first attempt.
The main limitation is that compatibility is narrow by design. It will not suit 2-pin, 3-pin, or other multi-pin strips, nor will it fit a board with a different width. Users should avoid prying up the metal pins because lifting them can interfere with contact. The included printed and online instructions are helpful, and the two additional couplers provide some flexibility for extending a run without using another corner.
This kit is a sensible choice for installers working with common RGB strips who want multiple corners and a few straight extensions in one package. It provides more flexibility than a basic four-piece corner set while remaining approachable for first-time LED strip installers. Verify the strip width, pin count, and positive marking before purchase, and align both ends carefully for the most dependable result.
The detachable L-shaped boards and straight clips let you adapt the installation as the route changes. That versatility is particularly helpful when a strip must wrap around a cabinet, pass through several corners, or continue beyond a single section.
Because the clips can be removed and repositioned, the connector is useful during planning or when furniture moves. Test the route with the strip powered down, then secure the final arrangement once the corners and positive alignment look correct.
We may earn a commission when you buy through this link, at no additional cost to you.
The PAUTIX kit is built for 8mm-wide, 2-pin COB LED strips and includes eight gapless L-shaped corner connectors along with two straight strip-to-strip connectors. It targets projects where the uninterrupted appearance of a continuous run matters, such as under-cabinet lighting, slim display channels, and decorative outlines that pass through a right-angle turn.
We may earn a commission when you buy through this link, at no additional cost to you.
Its upgraded construction reduces the visible space between connected sections, allowing the illuminated surfaces to sit close together. The thinner transparent design is also intended to fit more easily inside a channel than bulky alternatives. Installation is tool-free: place the COB strip ends into the connector, confirm that the positive and negative poles correspond, and press the connection closed without welding.
Compatibility is the decisive tradeoff. This kit is only for 8mm, 2-pin COB strips and is not suitable for 10mm boards or CCT tunable COB versions. Users should also inspect the strip ends and ensure that the metal contact areas are clean. Repeated installation is possible because the upgraded package can be reset, which makes the connectors useful for temporary or changing installations.
Choose the PAUTIX set when your project uses a known 8mm two-pin COB strip and a clean, gapless corner is the priority. It is a balanced choice for DIY users who want reusable hardware without soldering, while the two straight connectors add value for extending short runs. Confirm compatibility before cutting or preparing the strip ends.
The close-fitting design helps keep adjoining COB sections visually consistent. This is especially useful in aluminum channels or along furniture edges where a noticeable break would interrupt the light pattern.
Reusable contacts are convenient when testing a route, moving a fixture, or separating a strip for transport. Power off and disconnect the supply before removing any connector.
We may earn a commission when you buy through this link, at no additional cost to you.
The MIWISE kit provides twelve reusable, gapless L-shaped connectors specifically designed for 8mm, 2-pin COB strips. The generous quantity makes it well suited to multi-corner installations, while the stated 5V, 9V, 12V, and 24V support covers a broad range of common COB lighting projects. It is a focused solution rather than a universal kit.
We may earn a commission when you buy through this link, at no additional cost to you.
Installation is straightforward. The metal contact areas on both strip ends need to meet the corresponding contacts inside the connector, with the positive and negative poles kept consistent. Once the ends are fully seated, the connection can operate without solder. The gapless design preserves the appearance of a continuous strip, making it particularly effective in narrow channels and around display furniture.
One of the most useful features is reusability. Unlike disposable push-style connections, these connectors can be removed when a layout changes and installed again later. The strict fit requirement is also important: MIWISE expressly excludes 3mm, 5mm, 10mm, and 12mm strips, as well as 3-pin through 6-pin COB products and regular SMD or 5050 RGB strips.
This is the most complete reusable corner set in the group for compatible COB installations. It suits DIY users who expect several corners, want a gapless visual finish, and prefer solder-free hardware that can be reset. A five-year warranty and stated customer-response commitment further support the purchase, but the first step remains checking the exact strip width and conductor count.
The larger set reduces the chance of running short on a complex room or furniture outline. It is also practical for installations involving multiple display cases, shelves, or separate runs.
The connector presses against the strip’s copper contact areas to create the electrical path. Fully inserting both ends and matching polarity is essential for stable illumination.
We may earn a commission when you buy through this link, at no additional cost to you.
The BOXPUT CH1 kit takes a different approach from electrical solderless connectors. Its four black corner pieces accept strips from 8mm to 13mm wide and guide them through a 90-degree turn, while four L-shaped double-sided tape sections help hold the corner in position. It is particularly relevant around televisions, computers, ceilings, and other indoor surfaces.
We may earn a commission when you buy through this link, at no additional cost to you.
Because the user does not need to align metal pins or match a specific conductor count, the system is visually simple. The strip is inserted into the guide and pressed into place. This broad width range can be convenient when the exact board width is uncertain, and the corner geometry helps maintain a neat 90-degree route. Adhesive backing also allows the connector to remain attached to the mounting surface.
This is primarily a mechanical corner guide, so buyers should not treat it as a universal substitute for an electrical strip-to-strip connector. The product description emphasizes the width range and easy insertion rather than a solderless electrical joint. The tape is described as very sticky, so installers should avoid touching it with their fingers and should allow the mounted assembly to set before stressing the corner.
BOXPUT is best for straightforward decorative routing where the strip can be cut at the corner and the guide provides a clean bend and mounting point. It offers flexibility across several strip widths and avoids the fiddly business of pin alignment. The four-piece quantity and reliance on adhesive are the main constraints, making accurate placement and surface preparation especially important.
The stated 8mm-to-13mm range accommodates more strip sizes than a conventional two-pin contact connector. Still, visual fit does not imply electrical compatibility with a different connector system.
The 90-degree guide helps strips turn behind a television or computer while keeping their edges consistent. Clean the mounting surface before applying the supplied tape for stronger adhesion.
We may earn a commission when you buy through this link, at no additional cost to you.
This 42-piece kit is built around 10mm, 4-pin SMD 5050 RGB strips and includes eight L-shaped plates, four T-shaped plates, and 30 connector clips. Compared with a basic corner-only package, it can create corners, straight extensions, and three-way branch points. It is a strong option for larger RGB layouts that need several kinds of connections.
We may earn a commission when you buy through this link, at no additional cost to you.
The clips slide over the strip ends and create a solderless mechanical connection. Both positive sides must be aligned before the clip is closed, which is particularly important in a T-shaped arrangement where several powered branches meet. The kit supports 5V, 12V, and 24V strips, and its removable plates are useful when an installation needs to be changed during assembly.
Its limitation is that the complete system is specialized for 4-pin, 10mm boards. The large component count can also feel excessive for a single corner or short extension. Careful insertion is needed because each contact must reach the correct copper pad, and a T-junction demands greater attention to polarity than a simple L-shaped turn.
Choose this kit for RGB installations that include multiple branches, especially when a single connector supplier should provide every junction style. It offers good value for larger projects, while the removable clips and clear shape variety simplify planning. For a small single-color COB route, a dedicated two-pin corner kit would be a closer fit.
The combination of L-shaped and T-shaped plates covers common routing changes. This reduces the need to search for separate connector types when building a branched layout.
Compatibility extends across common 5V, 12V, and 24V 10mm four-pin SMD 5050 strips. Verify both board width and pin count before ordering.
We may earn a commission when you buy through this link, at no additional cost to you.
The EMITEVER set combines 12 transparent, solderless, L-shaped connectors with adhesive backing pieces. It is designed for common 5V, 12V, and 24V, two-pin COB and SMD strips. That broader SMD-and-COB positioning makes it a versatile option for projects that contain more than one conventional two-pin strip format.
We may earn a commission when you buy through this link, at no additional cost to you.
The updated connector geometry is intended to produce a gapless appearance, reducing visible interruptions and dark spaces at a turn. Installation requires no soldering: insert the strip, press the connector closed, and confirm that the contact points engage. Transparent material remains visually discreet in aluminum channels and against similarly colored installations. The connectors can also be disassembled and reused when the layout changes.
The adhesive backing adds a useful way to secure each corner to its mounting surface, but the strips are not included. Users must obtain suitable 3mm adhesive backing separately if the package quantity does not meet the project’s needs. Three-pin and four-pin LED tape is outside the stated compatibility range, so this product is unsuitable for RGB strips with more than two conductors.
EMITEVER is a strong pick for installers who want a refined, reusable corner system with both electrical and mounting support. It works especially well for slim two-pin runs in visible locations where transparency and a gapless profile matter. Ensure every strip is two-pin, clean the mounting area, and test contact before applying final adhesive.
Clear connector bodies blend into many channels and mounting surfaces. This helps preserve the uninterrupted look of the LED illumination without hiding the hardware in an oversized housing.
The press-fit contacts simplify initial setup, while the ability to disassemble the connector makes repositioning more convenient. Always disconnect power before changing a connected strip.
We may earn a commission when you buy through this link, at no additional cost to you.
The BTF-LIGHTING kit is tailored to 10mm-wide, 3-pin addressable LED strips, including WS2811, WS2812B, and SK6812 applications. It includes five L-shaped three-pin connector units and ten clips. The approach is straightforward: slot the strip into the connector and close the clip, avoiding the need to solder each corner.
We may earn a commission when you buy through this link, at no additional cost to you.
Its focused compatibility makes it useful for programmable lighting, accent outlines, cabinet lighting, and other projects built around common addressable strip families. Both waterproof and non-waterproof strips are supported, and the small L-shaped format can keep a right-angle run visually tidy. The clips also make it possible to disconnect or adjust a section without cutting and rewiring it.
There are two important restrictions. The product is not designed to support 144 LEDs per meter, and it is not compatible with ALTOVE LED strips. Because addressable strips can have different power requirements and data arrangements, users should confirm that the strip’s physical layout matches the three-pin connector rather than relying only on the appearance of the board.
This kit is best for a compatible WS2811, WS2812B, or SK6812 project that needs a small number of solderless right-angle turns. It is less attractive for dense strips or mixed product lines with unique layouts. Confirm the strip model, width, pin arrangement, and LED density before buying.
The three-pin contact arrangement is aimed at widely used programmable strip platforms. Matching those platforms is more important than choosing a connector solely by the board width.
Sliding in the strip and closing the clip avoids a soldering station. The simple process is useful for short accent projects where only a few corners are required.
We may earn a commission when you buy through this link, at no additional cost to you.
The Tatazone kit contains eight transparent L-shaped connectors for 8mm-wide, 2-pin, IP20 single-color COB strips. Its stated voltage range spans 5V to 48V, giving it broad electrical-format support while remaining narrowly focused on a specific physical strip design. The connectors create 90-degree, gapless corners without a wire or soldering operation.
We may earn a commission when you buy through this link, at no additional cost to you.
The clear housing is designed to preserve a clean installation, while the close-fitting geometry helps two strip sections appear continuous. Installation involves aligning the positive terminals, inserting the strip fully, and locking the connector. A user manual is included, and the simple strip-to-strip format should be approachable for basic DIY lighting projects.
The IP20 focus means it should not be assumed suitable for waterproof strips or outdoor installations. The product is also made for single-color COB lights rather than multicolor, addressable, or tunable systems. While a 48V stated maximum offers flexibility across low- and higher-voltage COB products, the voltage alone does not remove the need to confirm width, pin count, and type.
Tatazone is a practical choice for a single-color 8mm COB installation that needs several transparent right-angle joints. It offers broad voltage compatibility and a clean finished appearance. Verify the strip’s IP rating and physical layout, fully seat the copper contacts, and check polarity before energizing the installation.
The stated 5V-to-48V range covers many COB strip formats. Physical dimensions, pin count, and single-color construction still need to match before a connector can be used.
The transparent, gapless form keeps attention on the light rather than the connector. It works well for visible furniture outlines and single-color decorative runs.
We may earn a commission when you buy through this link, at no additional cost to you.
The LightingWill pack includes ten L-shaped, solderless, snap-down connectors for right-angle connections on 8mm-wide, two-conductor SMD 3528 and 2835 single-color strips. Its straightforward format and practical quantity make it suitable for basic furniture, shelf, and room-outline projects where a standard 12-volt strip needs several clean turns.
We may earn a commission when you buy through this link, at no additional cost to you.
The two-conductor design keeps installation uncomplicated. Once the strip ends are properly seated and the positive and negative conductors correspond, the connector closes to establish contact. No welding is required, and the snap-down form means the connection can be opened again if the route needs adjustment. The stated heat-resistance range extends from -20 to 100 degrees Celsius.
The clearest limitation is the 12-volt input specification. It is a single-color kit for 3528 or 2835 SMD strips, not a universal option for RGB, addressable, tunable, or other voltage families. Even when the physical width matches, users should confirm the conductor count and power requirements because an incorrect match can prevent proper operation.
This kit is a good fit for a standard 12-volt, 8mm, single-color SMD installation. It offers ten corners at a simple, approachable design without unnecessary extras. For basic projects with compatible strips, it is easier to justify than a broad multi-pin kit, particularly when all planned turns use the same two-conductor format.
The connector targets common 3528 and 2835 single-color strips, two LED formats frequently used in basic accent-lighting projects. Matching the board width and voltage is still essential.
The housing can be opened to disconnect or reposition a strip, which is useful during setup. Power must be switched off before making any adjustment.
We may earn a commission when you buy through this link, at no additional cost to you.
The LightingWill 2-Pin 8mm set contains ten transparent, solderless L-shaped connectors for 8mm COB and SMD 2835 or 3528 single-color strips. Its most distinctive feature is the stated 5mm thickness, which allows the connector to sit in tighter aluminum channels where a bulkier corner would be difficult to accommodate.
We may earn a commission when you buy through this link, at no additional cost to you.
The transparent crystal-style body is designed to avoid dark areas at the junction, helping the strip maintain a complete and unobstructed glow. Installation follows a conventional sequence: open the tabs, check the positive and negative terminals, insert the strip into the groove, and close the tabs. Copper clips inside the connector provide the electrical contact without soldering.
The kit is limited to two-pin, 8mm single-color strips, so it will not handle RGB or addressable configurations that use additional conductors. The thin housing can also be more delicate than a larger mechanical connector, making complete insertion and careful tab closure important. Users should avoid forcing a strip into a connector whose dimensions or contact layout do not match.
LightingWill is a good option when appearance inside a narrow channel matters as much as simple installation. The low profile, transparent construction, and ten-piece quantity make it particularly attractive for visible single-color COB and SMD installations. Check the channel’s internal clearance and confirm the strip’s dimensions before ordering.
The stated 5mm thickness leaves more room inside compact profiles than many conventional L connectors. Measure the channel opening and its internal depth before installation.
Transparent material reduces visual obstruction around the light source. Fully seating the strip and closing the tabs carefully helps maintain an uninterrupted beam.
We may earn a commission when you buy through this link, at no additional cost to you.
The safest choice begins with exact physical compatibility, followed by connection quality, installation method, and project conditions. Because strip lights use different widths, conductor counts, and contact layouts, a connector that looks suitable can still fail if any of those details differ.
Measure the total width of the LED strip board, not only the illuminated area or the width of the copper pads. Most products in this guide are designed for either 8mm or 10mm strips, while the BOXPUT guide accepts a wider physical range. A connector must hold the complete board without forcing it, and its metal contacts must land on the strip’s conductor pads. Even a small width discrepancy can prevent full insertion or leave the pins touching the wrong area.
Choose by the stated width and confirm the measurement from the actual strip. Do not assume that an 8mm connector can accept a 10mm board or that a close-looking guide provides a reliable electrical joint.
Pin count determines the connector family. Two-pin connectors suit many single-color COB and SMD strips, three-pin connectors are commonly used for addressable strips, and four-pin connectors support many RGB configurations. The contact order must also match. A four-pin RGB connector cannot safely replace a two-pin single-color connector merely because both are L-shaped.
Inspect the printed markings, connector end, or product documentation for the strip. Count the conductors and confirm whether the product is single-color, RGB, tunable, or addressable before making a selection.
Solderless press-fit or snap-down contacts are convenient and removable, but they depend on proper alignment and clean copper pads. Mechanical corner guides hold a strip in position without necessarily joining conductors, so they are not direct substitutes for an electrical connector. Some premium kits also include adhesive backing to stabilize the corner on the mounting surface.
Decide whether you need an electrical junction, a route guide, or both. Use true strip-to-strip connectors wherever power must continue, and follow the voltage, polarity, and environmental restrictions supplied with the product.
A gapless connector places the two strip ends close enough that the illuminated surfaces appear continuous. This is important for COB strips, which use a dense line of LEDs and make spacing more visible. Traditional L-shaped connectors can still create a clean turn, but a visible break may be apparent when the lighting is bright or the installation is viewed directly.
For visible furniture outlines, display channels, and uninterrupted light paths, favor a product explicitly described as gapless. For concealed or segmented installations, a standard L-shaped connector may provide all the functionality required.
Some kits support several common voltage levels, while others are designed for 12-volt input or simply describe the strip format they fit. The stated voltage range is useful, but it does not override the need to match the physical connector. COB, SMD 2835, SMD 3528, SMD 5050 RGB, WS2811, WS2812B, and SK6812 strips all have distinct configurations.
Use the product description to confirm both electrical format and LED type. For specialized strips, check the manufacturer’s guidance or test a single connector before installing the entire run.
Reusable connectors are valuable when a project is still being planned, furniture may move, or the lighting needs to be divided into several sections. They can be opened and removed without cutting the strip or repeating a solder joint. Fixed or disposable push connectors may be simpler for a one-time layout but offer less flexibility if the route changes.
Choose reusable hardware when installation adjustments are likely. Label connectors and routes before final mounting, and disconnect power whenever a joint needs to be opened.
Indoor decorative strips often have smooth painted surfaces that accept adhesive backing, while textured or dusty surfaces may require another mounting method. Adhesive is also sensitive to application pressure, temperature, and surface cleanliness. A connector can work electrically yet still lift away if the tape is touched or the joint is stressed immediately.
Clean and dry the intended surface, apply the adhesive as directed, and avoid placing force on the corner while it bonds. If the strip runs inside a channel, check both clearance and access to the strip ends before cutting.
Corner kits range from four pieces to as many as twelve dedicated corners, and some include additional straight, T-shaped, or extension components. A small project may need only one or two corners, while a room outline or multi-shelf installation may use many. Larger kits can also be useful as spares because each electrical joint is a potential point of failure.
Count the 90-degree turns in your planned route and add straight or T-junctions separately. Choosing a mixed kit can simplify installation, but only if every included plate matches the strip’s width and conductor layout.
Begin by disconnecting the LED strip from its power supply. Measure the board width, count its conductors, and confirm that the connector is designed for that strip type. Clean the exposed copper contact areas and the connector interior so dust or oxidation does not interfere with the electrical path. For a mechanical guide, also clean the surface where the adhesive corner will be mounted.
For an electrical corner connector, insert the two strip ends into the appropriate channels or grooves. Keep the positive and negative conductors aligned, ensure each copper pad reaches the matching metal contact, and press or snap the housing closed without forcing it. For a guide with adhesive backing, center the strip in the corner, press the connector into position, and attach the supplied tape to a clean mounting surface without touching the adhesive.
Reconnect and test the strip before securing the entire route. A corner with reversed polarity, incomplete contact, or a poorly seated strip may flicker, remain dark, or produce uneven color. Once the connection is confirmed, route the strip gently, avoid pulling at the joint, and leave adhesive corners undisturbed while they bond. Before cleaning or repositioning the installation, switch off and unplug the supply.
Usually not. Most RGB strips use four conductors, while the two-pin connectors in this guide are intended for single-color COB or SMD strips. A four-pin RGB strip requires a connector with the correct four-contact arrangement and matching polarity. Confirm the pin count, board width, and contact layout before buying rather than relying on the shape of the connector.
No. Two-pin, three-pin, four-pin, and other conductor arrangements require different contact layouts, even when the boards are all 8mm wide. COB, SMD, addressable, RGB, and tunable strips may also have different contact positions. Match the connector to the exact strip family, width, and pin count, then confirm that the strip ends fit the connector channels.
Some are explicitly designed to do so, including the PAUTIX, MIWISE, EMITEVER, Tatazone, and LightingWill transparent two-pin options in this guide. The two strip sections sit close together to reduce visible spacing, but appearance also depends on accurate insertion and the strip’s own LED layout. Always compare the connector’s stated gapless design with the physical strip you plan to use.
Yes, if the product is designed as reusable. The PAUTIX, MIWISE, and EMITEVER options specifically describe removable or reusable construction. Disconnect power, open the housing carefully, and inspect the metal contacts for bending or debris before reinstalling it. A connector that no longer holds the strip securely should be replaced.
Disconnect the power, align the positive and negative conductors, insert both strip ends fully, and close the connector or clip. For an adhesive-mounted guide, clean the surface and attach the tape as directed. Test the corner before securing the rest of the route. If the section flickers or does not illuminate, check polarity, contact alignment, and whether the strip is completely seated.
That depends on both the strip and the installation environment. Some connector products support waterproof strips, but the connector housing itself may not be weatherproof, and exposed joints can still create a safety risk. The Tatazone kit is specifically described for IP20 single-color COB strips. For outdoor use, follow the strip manufacturer’s environmental requirements and protect every power connection appropriately.
The most common causes are mismatched polarity, incomplete strip insertion, dirty copper pads, or a connector that does not match the strip’s width and pin count. Turn off the power and inspect both ends. Push the strip fully into the correct channels until the contact pads sit against the connector contacts, clean the surfaces, and confirm the product’s exact compatibility specifications.
Use an electrical connector when two powered strip sections need to meet or when the strip must continue around a corner. A mechanical guide is appropriate when the strip is cut and simply needs controlled positioning around a 90-degree turn. Some installations use both, but a guide should not be assumed to carry power from one strip section to another.
The MIWISE 8mm 2-Pin COB Kit stands out for compatible COB projects that need a generous supply of reusable, gapless corners. JACKYLED offers the strongest budget value for 10mm four-pin RGB installations because it handles both corners and extensions, while the EMITEVER pack provides a polished reusable system with transparent construction and adhesive backing for two-pin strips.
Prioritize exact fit before considering convenience or appearance. Verify board width, pin count, conductor layout, strip type, voltage, and environmental requirements, then select a connector based on the junction style your route actually needs. A dedicated two-pin kit is best for most single-color COB runs, while RGB and addressable installations need connectors made for their corresponding contact layouts.
Ratings, availability, and prices can change, so check the current listing and product details before ordering. Compare the included component count, installation method, and compatibility notes with your planned layout, and make sure the connector’s dimensions fit the channel or mounting space where the corner will sit.